Pages

Subscribe:

Wednesday, November 30, 2011

CHARLIE BROWN TREES!

HI EVERYONE,

I'm still here but been very busy with orders from my wonderful customers.

I had planned on getting my decorating done this week but it didn't happen - maybe this coming week if all goes the way I plan.

I did close all Christmas orders on my website so I don't get backlogged as Christmas gets closer and this is why you haven't seen me on your blogs commenting and looking at all your beautiful Christmas decorating and family happenings....I know I'm missing out on so much but rest assured I will visit you soon!

I did need to get out of the house yesterday and while out we went to a little local shop and I bought a 6 ft. Charlie Brown tree and today Doug tried to get it shaped up...but he couldn't understand why he had to 'shape it' - it looks like a tornado hit it so no matter what he did to it he said it didn't look much different - he did good though. Now I just need to adjust the branches where I want them.

I have a 3 ft. and 4 ft. tree like it and they fast became my favorite decoration for the season.
Anyway I wanted a larger one for my Mercury ornaments being the collection is getting bigger.
Hopefully after it's decorated it will look better.
One thing I'm not sure of is whether to put lights on t or not...any ideas on this?

So here's the 6 ft - still needing much work and I'm really not sure just where or which room it will go in - Doug says it is going to be our main tree...he's not bringing the other larger one up as long as we have this one. So I guess I had better work some magic here!
And YES IT LOOKS CRAZY and NO...IT'S NOT SHAPED THE WAY IT WILL LOOK IN THE END!

 My 4 ft. tree that held my Mercury ornaments last year...not sure what I will put on it this year.

And my sweet little 3 ft. kitchen tree in the Tin Dough Riser...my original Charlie Brown tree and my favorite.


So this my dear blogging friends is why I'm MIA and will be yet for another week at least.
Blessings,
Karen

A 'tail' of two halves...creativity and destruction!

Being the last weekend before the Swedish Fayre, and being ever so slightly concerned that I wouldn't have enough goodies for my stall, I decided to spend Sunday afternoon cooking up some of the pinecone firelighters that feature in our book, A Green Guide to Country Crafts. 
They are ever so simple to make so, having gathered together all of the suitable vessels I could find to fill, I set about melting my soy wax flakes...
The job was made all the easier due to a recent find in our local Sue Ryder Charity shop - this rather fetching preserving pan - very sturdy and in great condition.  A steal at £5! 
I waxed some wick and put one in each mould before filling with melted wax.....
And then topping each one off with a hand-picked pine cone!  The trick is popping in the pine cone just at the right time - when the wax has partly set.
The metal patisserie moulds are the ones I used in the book, but I have to say, the silicone moulds worked a dream and were dead easy to slip out once the wax had set.
All ready to go the fayre!

And then.....ready and waiting to counter my burst of creativity head on...Rory the destroyer set to work!
Firstly it was hubby's (quite expensive) slippers.....whilst my back was turned for a moment.
Followed shortly afterwards by the very swift destruction of a new toy.  It lasted all of half an hour in Rory's very capable paws!
And as something of a finale, a pair of our lovely painted bamboo needles bit the dust care of yours truly!
Good job I love him to bits, little monkey!
Still, without him, I would not have been out walking this morning and I would have missed the pleasure of these.  I just love the ethereal quality of honesty and have an idea for using some to make a card for a friend.....
Jacquix

Tech Talk


I am thinking about my next house. I am thinking and planning and visualising. I have files and files of images that I am using for inspiration in planning my next project. This image is a favourite as I like the idea of eave returns on gables. An 'eave return' is the extension of the roof eave at the gable end of the building. I do love the boxy chunkiness of the eave return on this dormer gable. It all works for me.. the roof pitch of the dormer, the eave return... and the exterior colour that contrasts so beautifully with white trims, the shingles. Sigh. The cupola stops my heart too. Gotta have a cupola.... somewhere. 


If you have a penchant for technical drawings, here is what I would consider the perfect eave return, drawn up by Travis Kinney of Gulfshore Design . I like how the little roof on the return has quite a low pitch and I love the molding under the return. 


Look at the eave return on his latest project. Perfect.

I am going to see if Mr Kinney consults from afar, like over the sea and down into my hemisphere. I love his work. Wouldn't that be exciting... working from one of his drawings.

In other non technical, motherly news... school is out as of 3pm this afternoon. Looking forward to hanging out with my boys for weeks and weeks on end.

Hoorah! What. A. Year. We made it!

Happy Thursday! Happy 1st of December!
Photobucket

Simple Stockings

stockings1

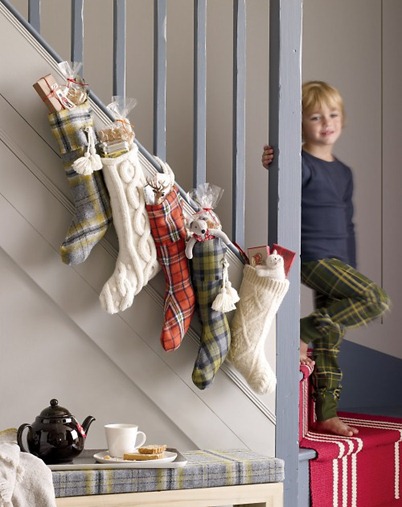
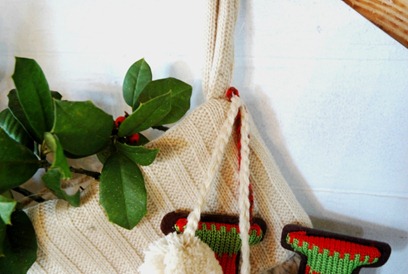
How thrifty is this?  Using old sweaters and flannel shirts to make stockings.  When I originally saw this image on Pinterest, I was instantly sold on the recycled, hand made holiday aesthetic.  But being the purger that I am, I didn’t have any old sweaters or flannel shirts sitting around in storage.  Several trips to Goodwill later, I was able to successfully stock up on a pile of cable knit.  The problem?  It’s still in a pile.  I never got around to the project.  Sigh. 

stockings8

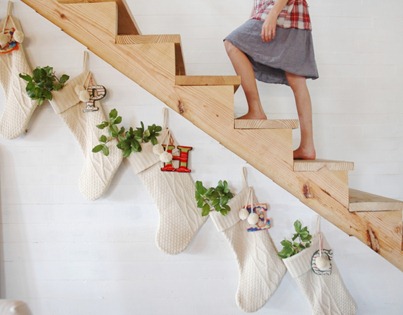
But thanks to my friendly neighborhood Target, I got off the hook.   So much for the “recycled” aspect.  But it still looks “homemade holiday”, especially  mixed with our unfinished staircase.  ;) 

stockings3

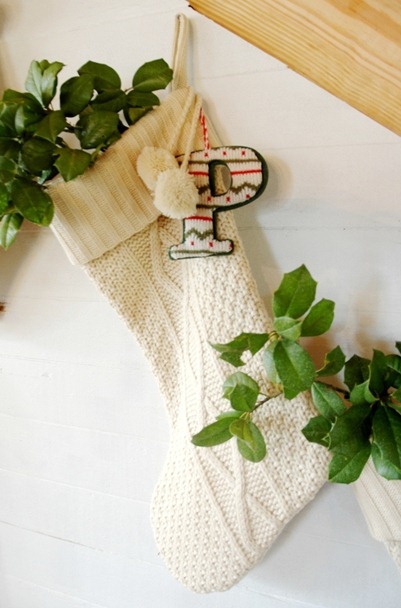
The stockings were around $12 a piece.  The monograms add a personal touch, and each letter is on sale for $2.50 in the ornament section… thrifty! 

stockings6

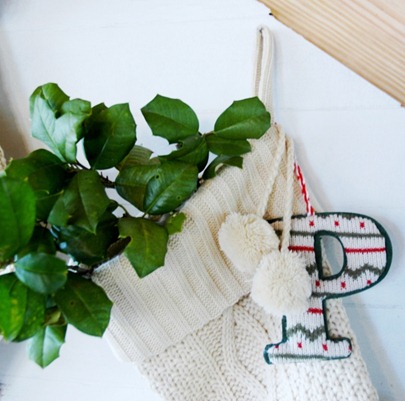
I simply tied the pompom strings around the ornament string.

stockings4

If you ever get around to the recycled stocking project, I have some old sweaters you can use.  :)  

A model hotel

If this morning's hotel wasn't quite your thing, how about this one? This is a snap shot from The Exchange hotel in Amsterdam. where each room is designed by a student from the Amsterdam Fashion Institute. Talk about staying in style!

Picture: The Exchange Hotel via April & May

Quick Barbecue Pork Chops

I recently confessed to having a tough time with pork chops. I asked the ladies on my cooking board for recommendations and this Quick Barbecue Pork Chops was one that immediately caught my eye. What could be easier than browning chops and then letting them simmer on the stove with BBQ sauce and a little brown sugar?


I think this recipe hinges on the sauce you use. When it comes to BBQ sauce everyone has their own preference, with tangy vs. sweet being the biggest divider. We are tangy fans and after a lot (and I do mean a lot. I think we tried every brand our store sells) of searching we found that Dinosaur is our favorite. Homemade sauce would obviously be great as well.

I served my chops with Buttermilk Mac and Cheese and green beans, but if you're making these in the summer I suggest potato salad and fresh corn on the cob. We both enjoyed the flavor of the chops and I enjoyed not having to work very hard to make them. I'll definitely be using this method again.

Quick Barbecue Pork Chops
Get Off Your Butt and Bake

2 tablespoons canola oil
4 boneless pork chops
1 1/2 cups of your favorite barbecue sauce
Salt and pepper
1 tablespoon brown sugar

Heat oil in a skillet over medium-high heat. Season pork chops with salt and pepper on both side, then add to skillet. Let brown, about 5 minutes per side, turning only once. Add BBQ sauce, bring to a simmer, then turn heat down to maintain a light simmer. Sprinkle in brown sugar and 3 tablespoons of water. Mix the sauce, water and brown sugar together by moving the pork chops around a bit.

Let simmer slowly for about 20 minutes or until chops are tender.

Tuesday, November 29, 2011

Surround yourself with beautiful pieces

Morning and happy 'lilla lördag' (little saturday) as it's known in Sweden as everyone should go out and have a mid-week drink. Not for me unfortunately, so instead I am mentally transporting myself to one of three apartment suites in the Azzedeine Alaia hotel in Paris....


Photographs: Persona Production via SF Girl By Bay
The rooms, designed by Yatzer, have carefully selected the furniture and lighting and kept everything else minimal so that you can enjoy its beauty and your stay. Oh and I would Yatzer, I would. It also supposedly leaves room for the guests own creativity. What do you think? Something for the weekend? Or to stark for your tastes? Read more about it here.  

MAGAZINE PICKS / MAGAZIN MUSTRA - December

Három külföldi magazin tele sok, jó karácsonyi ötlettel:

Three magazines full of nice ideas for Christmas: 


Related Posts Plugin for WordPress, Blogger...